TPM 2.0 & Secure Boot: an easy step-by-step guide
As many of you will now know, Microsoft recently announced that Windows 11 would be arriving later this year. Although there won't be any particularly significant differences from Windows 10, besides a few UX and QoL changes, the biggest difference will arrive in the form of new potential system requirements. The most notable of these being the mandatory enabling of TPM 2.0 and Secure Boot.
But what exactly are these features? What do they do and how do they affect those wanting to run on Windows 11? Why did Microsoft even make this decision to begin with? Well, it all comes down to security and sensitive data.
A new foundation for a more secure desktop experience
When Microsoft announced that Windows 11 did in fact exist, they made a big point about security. In fact, they said that having a new and improved foundation for better security was at the forefront when they first began developing the updated OS. And so, that's where TPM and Secure Boot came into play.
According to Microsoft, one of their primary concerns was with malware attacks that specifically targeted system vulnerabilities which are present prior to an OS fully initialising. As such, by enabling these new security features, it would be possible to mitigate these weaknesses by locking down the very hardware on which the OS is installed. This, of course, would help keep user data even safer than it was with Windows 10, by adding two additional layers of protection before post-boot anti-malware applications like Windows Defender or Symantec Endpoint Protection would come in to play.
But what exactly are they?
What is Secure Boot?
Secure Boot is not a new concept by any means. It's actually been around for quite some time, with adoption and implementation of the feature kicking off back in 2012, again based on a requirement set out by Microsoft for the then-new Windows 8 OS.
In a nutshell, whenever your PC boots up, Secure Boot checks that the OS comes from a trusted source. It does this by verifying the digital signature against a predetermined whitelist, which prevents unwanted "bootware" from gaining access to, or control of your PC. That way, in the event that malware does make it onto the PC, it can't take advantage of an otherwise vulnerable UEFI, which ultimately reduces the risk of your sensitive data being acquired.
That said, it is still possible for particularly sneaky malware to fake a digital certificate or signature, making it appear as though it falls within the whitelist checked by Secure Boot. This is where TPM 2.0 can help take security a step further.
What is TPM 2.0?
Much like Secure Boot, TPM (Trusted Platform Module) is no new concept. In fact, it was supported by both Windows 7 and Windows 10, but Microsoft didn't previously enforce the use of the feature as a prerequisite to installing their OS.
Whenever your PC encrypts data, be that simple text documents or a set of passwords and personal information, that encryption is performed using multiple parts of your computer's hardware. And all the while, as requests are being sent, received, and processed by that hardware, it's also being held in your system's memory. This leaves the data extremely vulnerable and easily accessible to any nasty malware that's managed to sneak into the system.

The idea of TPM 2.0 is actually quite simple then. In essence, TPM acts as a sort of Blackbox for your system, which holds the keys to decrypting any sensitive data on your PC. This means that any sensitive encrypted information can only by accessed by the hardware within the same system as the TPM. For example, if someone were to physically remove an encrypted drive, or managed to copy the data onto a different system, that encrypted data would be separated from the TPM and thus the keys required to decrypt it. Equally, TPMs are specifically designed to be "tamper proof," making attempts to breach the module and access the decryption keys extraordinarily difficult. So even if someone managed to access your entire system, either remotely or physically, your data would still be protected.
TPM comes in two possible forms: a TPM chip which is installed directly onto the motherboard, or as firmware provided by your processor's manufacturer (fTPM for AMD, and PTT from Intel). But what's the difference between the two?
Do you need to buy a discrete TPM (dTPM), or will firmware TPMs (fTPM) suffice?
In doing research on the topic, you may have come across various forums and redditers debating whether a dTPM or fTPM is more secure, and most likely, you'll have seen that the consensus seems to be dTPM.
Whilst this is arguably true, the difference is not a particularly big one, and ultimately the debate comes down to two things; degrees of separation, and trust.

What we mean by this is fairly straightforward. Simply by having a separate component in the case of a dTPM, there is a greater degree of separation from the other components in your system, as it's not integrated into another piece of hardware. This makes it more difficult for potential attackers to get to since they can't use a vulnerability elsewhere in the system to access it. They must specifically target the TPM, which is far more difficult to do.
Meanwhile, when we talk about trust, we're talking about certification. Most dTPMs are usually given some form of certification. Although this does not guarantee additional security over an fTPM, it does at least demonstrate that set requirements and standards have been met and verified. In particular, it proves that there is protection against some of the most common hardware attacks used by malevolent parties.
That said, seeing as the fTPMs under consideration here are almost certainly going to be those provided by Intel and AMD processors, it's safe to say that both companies take security very seriously. So although they won't necessarily have the same certification that dTPMs do, their solutions are definitely robust enough for the vast majority of users and will still cover those most common hardware attacks covered by dTPM certificates. So in this instance, the trust element comes more from the user deciding whether they do or don't trust Intel and AMD to protect their data.
How to check if your system supports TPM and Secure Boot, and how to enable them
Checking whether your system has TPM functionality is relatively easy. You can start by seeing if it's enabled (provided your system supports it) by simply using run commands.
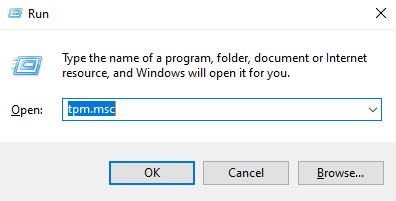
Press WinKey + R on your keyboard to open the console. Then simply type "tpm.msc" as demonstrated below, and press enter.
This will open the following Window. As you can see, in this instance, either my system doesn't support TPM, or it needs to be enabled in the UEFI.

As for Secure Boot, go to the search bar in the bottom left of the task bar, or press WinKey + S to open the search menu. Type "System Information," and click the first icon that appears. This will open the following window:
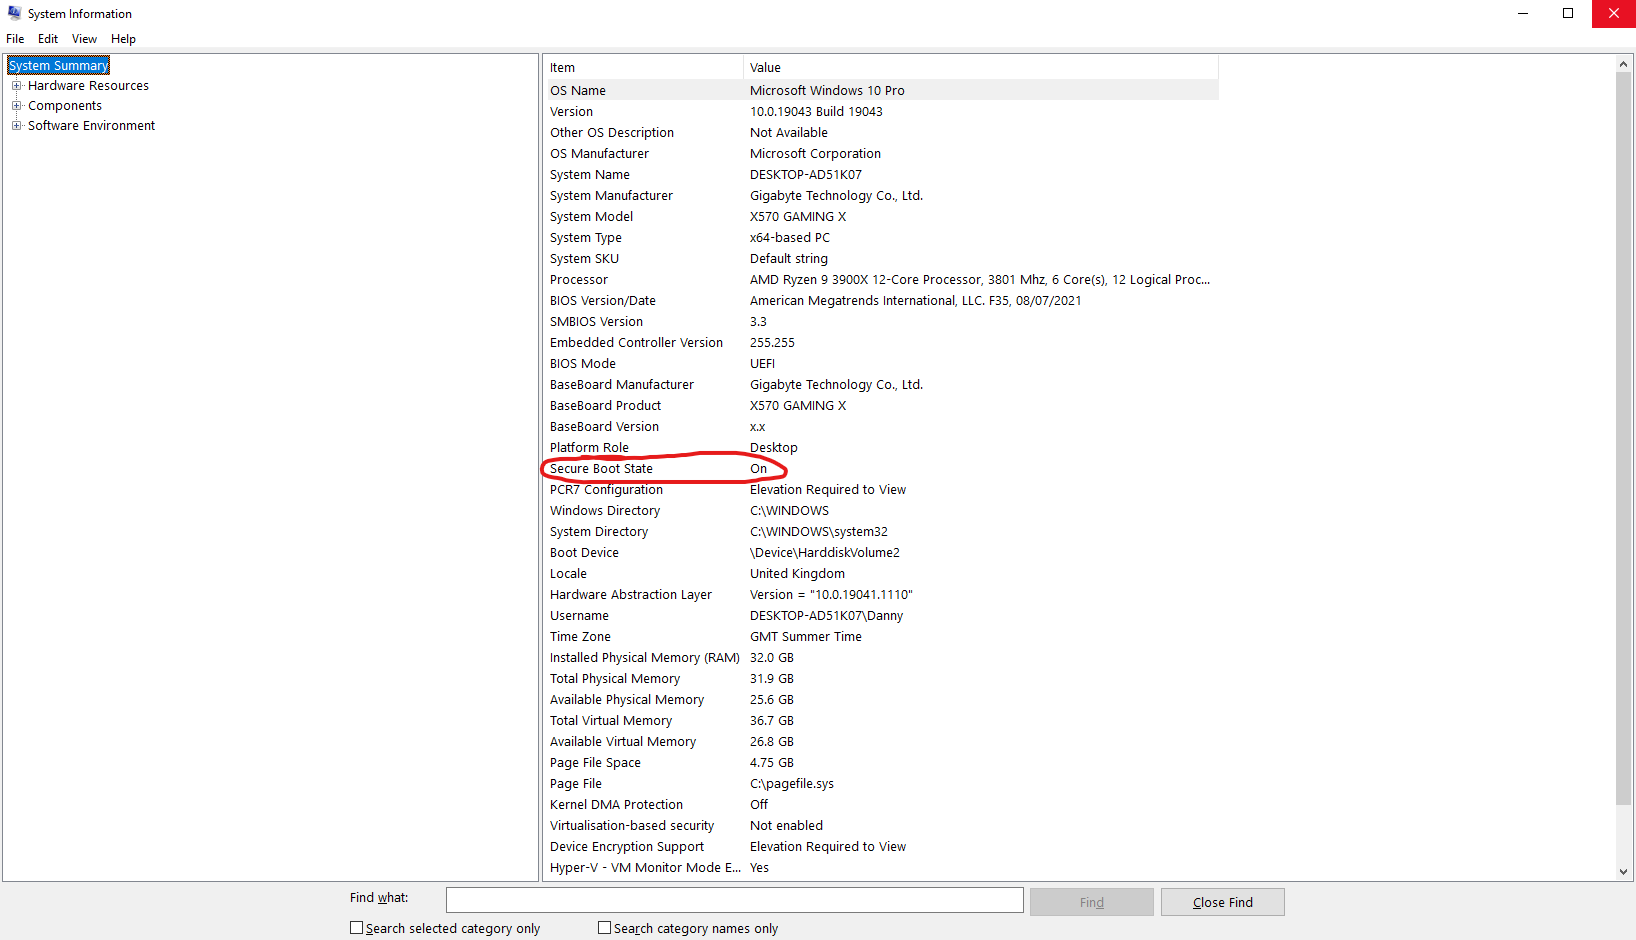
Here you can see various information about your system, including whether Secure Boot is enabled. If the Secure Boot state is listed as disabled, then this will also need to be enabled in the UEFI.
To access your UEFI, simply right-click the Windows icon in the bottom left of the taskbar, and navigate to the restart option. Then, hold left-shift on your keyboard, and left-click Restart. This will bring you to the following screen:
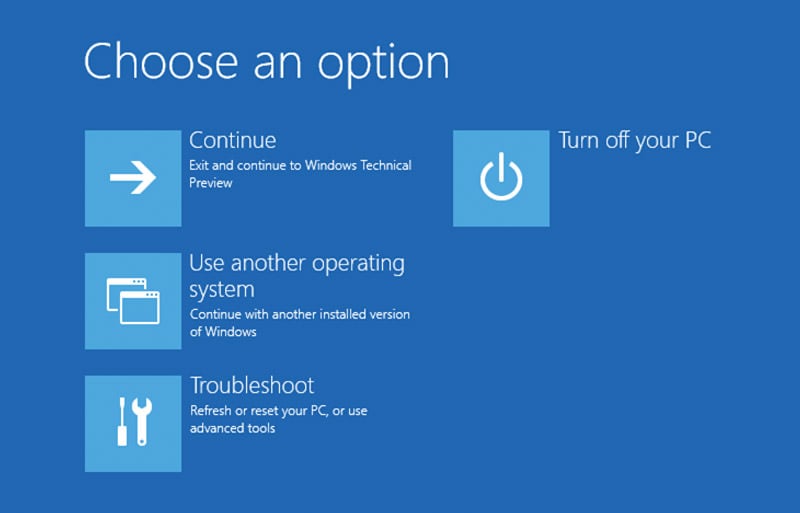
Click the Troubleshoot option, then Advanced Options, and select the option for UEFI Firmware Settings. This will then prompt you to restart the system, but rather than booting straight to desktop, it will instead enter the system UEFI. How this looks and where options are located will vary between motherboard manufacturers, but from here you'll be able to locate an option to either enable a dTPM, or the appropriate firmware TPM offered by your processor (fTPM for AMD, and PTT for Intel).
This is also where you'll be able to locate the option for Secure Boot, if your system supports it. Once again, the location of the setting will vary from manufacturer to manufacturer, but should always be listed simply as Secure Boot. Some systems will also list an option for something called CSM; if this setting is enabled by default, you may not be able to see an option for Secure Boot. In this case, you'll need to disable it. This will then allow you to locate the Secure Boot option. After enabling Secure Boot, also be sure to install/restore the factory defaults in order to fully activate the feature.
Once you have enabled the two features, be sure to save your changes before exiting the UEFI. In some instances, you can even save the settings as part of a profile, which will allow you to quickly reload these settings should you ever need to revisit the UEFI in the future.
Upon saving and exiting, your system will restart, with TPM and Secure Boot now enabled. You can confirm this by once again using the previously mentioned methods. Using System Information, you should now see that the Secure Boot State is listed as enabled.
Meanwhile, if you've successfully enabled TPM, reopening the TPM Management window with tpm.msc should now result in something that looks like this:

As you can see, you'll also be able to verify which version of TPM your system is using, by referencing the TPM Manufacturer Information, on the bottom right.
However, it is possible that even after enabling TPM in your UEFI that this screen still indicates that it has not been registered as active. This most likely means your Motherboard BIOS is outdated, and will need to be updated with the latest version (which happened to be the case for me, as I was writing this article).
How to update your Motherboard BIOS
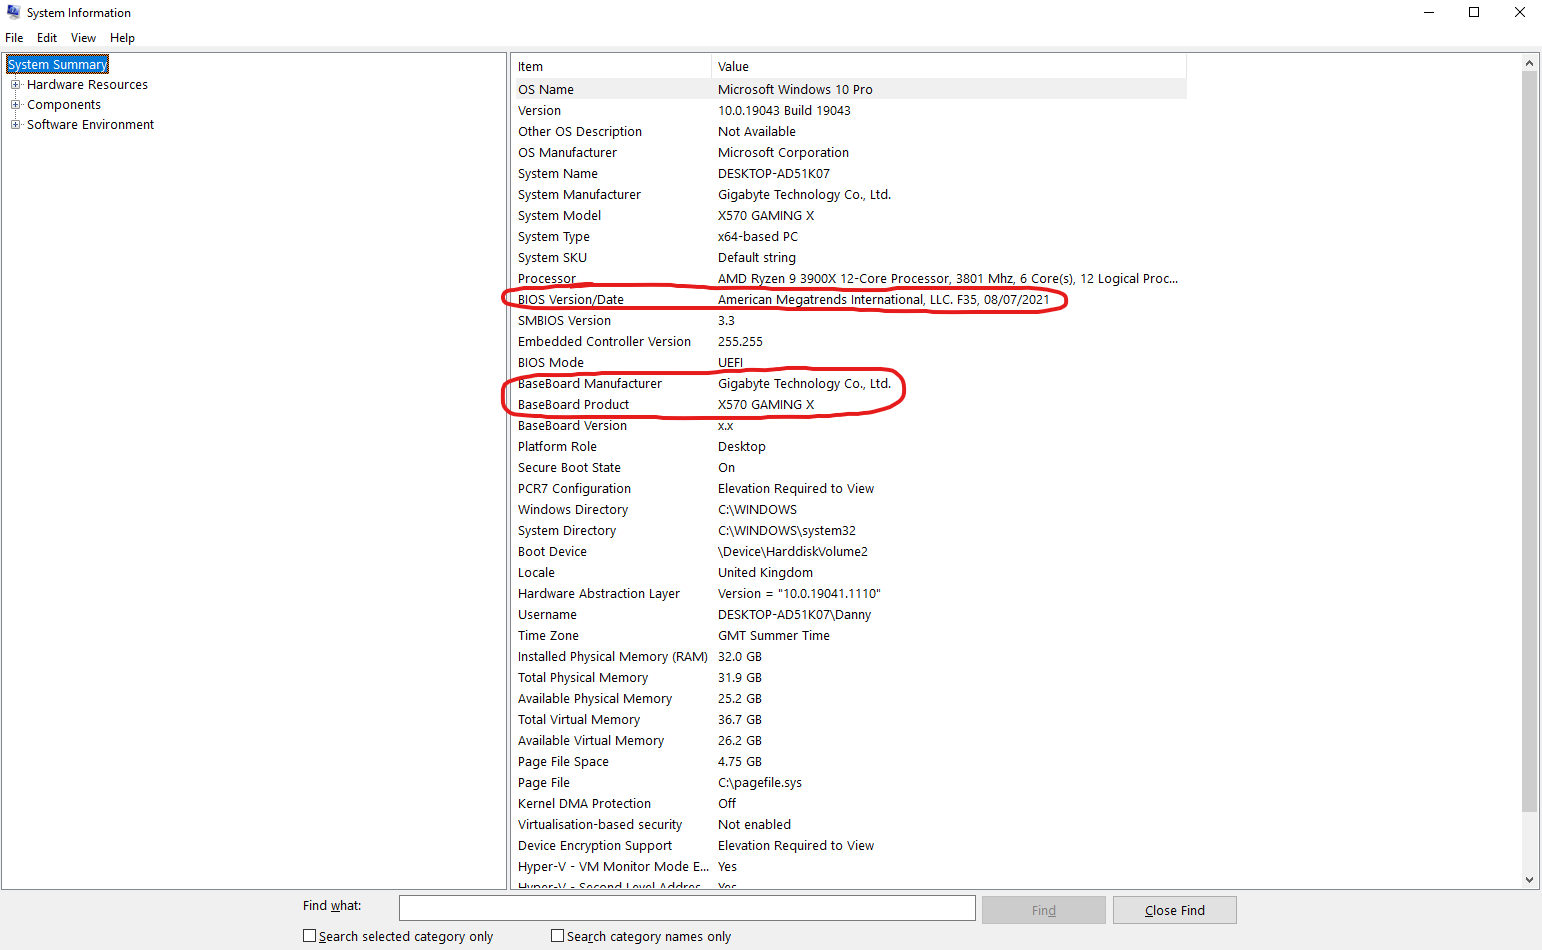
In order to update your motherboard BIOS, you'll need to know both the model and the manufacturer of your motherboard, as well as which version of the BIOS it is using currently.
To find out what motherboard and BIOS you are using, simply return once again to the System Information window which we used to check for Secure Boot. Here you can find the BaseBoard Manufacturer and Model listed accordingly, and which BIOS version your system is operating on.
Once you have this information, you can head to the manufacturer product page for your motherboard, and locate their support/downloads section, where you should be able to find several BIOS versions for download. Depending on when and from where you purchased your system or motherboard, you may well find that it is still running on the first available version, which could well be a few years old.
Downloading the latest version should provide you with either a .zip, .7z, or .rar file, which can be uncompressed using your preferred application. If you do not have a means of extracting files from compressed folders, I would recommend using either 7-Zip or WinRAR.
Copy and paste the uncompressed folder onto the blank USB drive, then follow the steps mentioned earlier to access your system UEFI (leaving the USB drive plugged in). Once inside the UEFI, you'll want to find an option labelled something along the lines of EZ-Flash, M-Flash, Q-Flash etc.
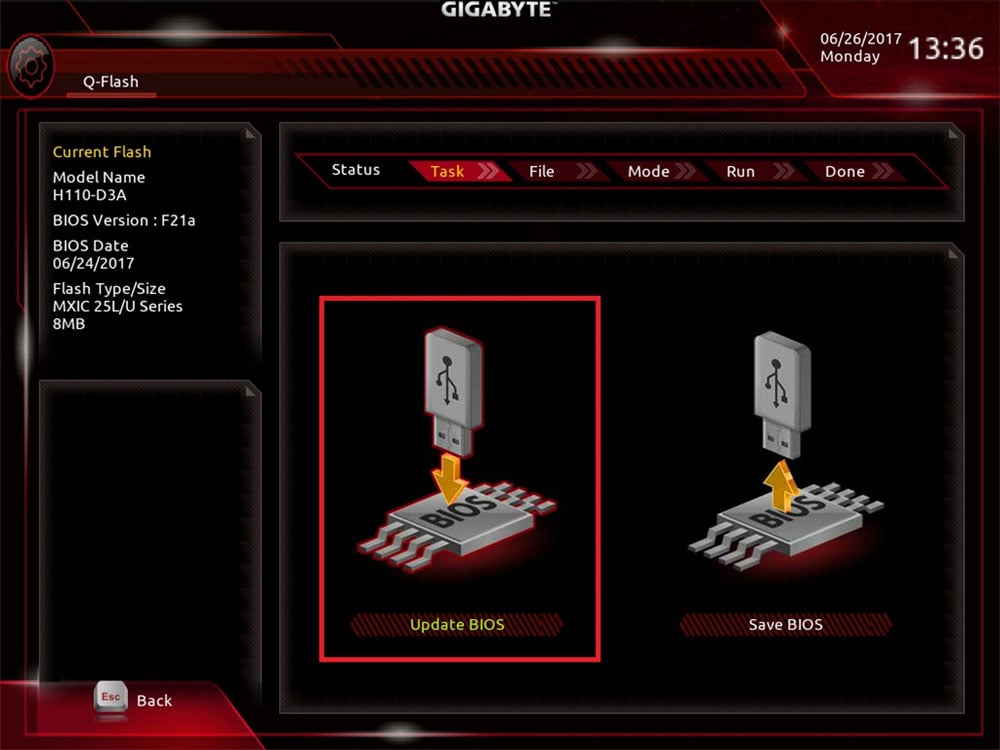
Under this setting should be an option to update the BIOS. Select this option and press enter, which should then prompt you to choose the drive with the files you'd like to install (so in our case, the USB drive), then the file itself. Provided you have used a blank thumb drive, you should only have one option to select here.
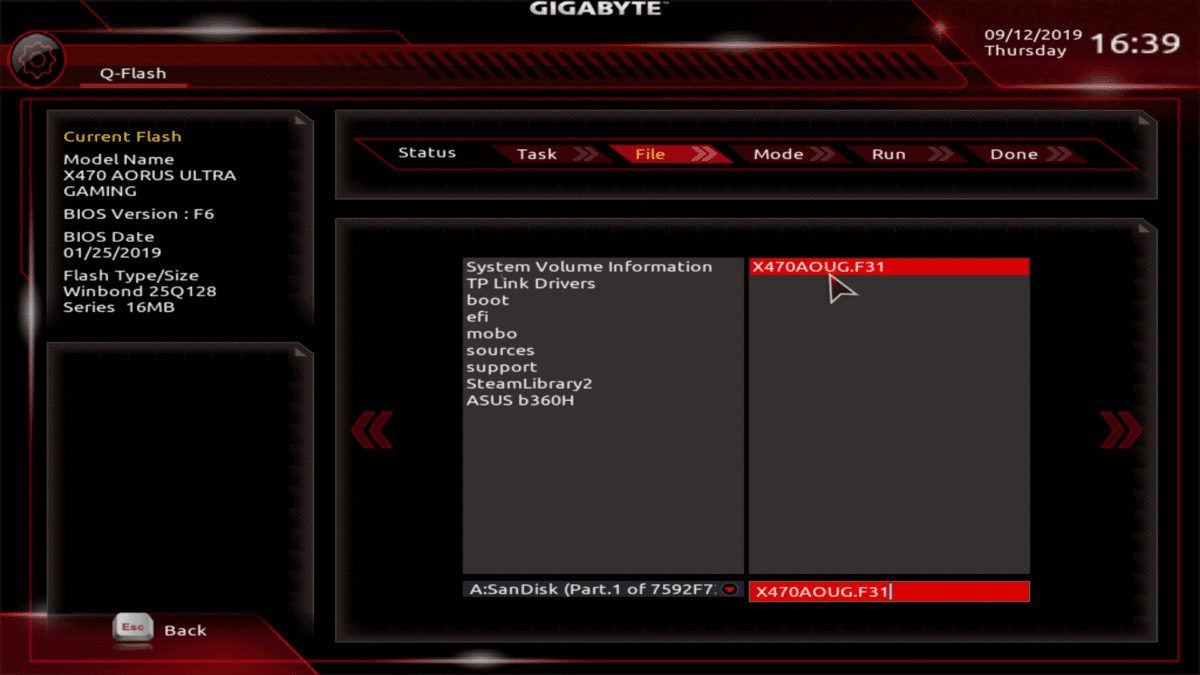
Then follow the step-by-step prompts and the installer should start. It usually takes a couple of minutes, but once complete, you should then see that the BIOS version has been updated to the latest version, which you can check once more in the System Information panel the same way as before.
What if my hardware doesn't support TPM and/or Secure Boot?
In the unlikely event that your system doesn't support these features but you'd still like to make use of them, then you have two options: if your system does support Secure Boot (which most PCs built post-2014 almost certainly will), but doesn't support TPM, then you can simply purchase a dTPM. They are easy enough to install, even for the uninitiated PC user, and there are plenty of videos and guides available to help too.
However, if your system does not for some reason support Secure Boot, unfortunately, the only solution is to purchase newer hardware. If you're on PC, replacing just the motherboard is certainly do-able, especially if you use one of AMD's Zen-based processors, which have multiple generations supported on even the latest motherboards (usually with a BIOS update). But if you're using a laptop or an OEM-built system from SIs such as Dell, HP, Lenovo etc., it will likely be using a propriety motherboard which won't be easily replaced, if at all.
Still, on the flip-side, it could be exactly the excuse you needed to get that sweet new gaming PC or laptop you've always wanted!
Check out our full Reign Gaming Range
All of our systems are Windows 11 compliant, ready to upgrade when the time comes
Find them hereWhat if it does support them but I don't wish to enable them? Will I have a choice?
Similarly to finding yourself in a position where your hardware doesn't support these features, even if it does but you don't want to enable them, you of course have the choice not to do so. Microsoft can't make you enable these measures, though you won't be able to upgrade to Windows 11 if you decide not to. However, if you're happy using Windows 10 for the time being, then Microsoft have said that they will be continuing to support the OS until 2025, so there's certainly no rush to upgrade just yet.
There's also still the chance that they may U-turn and backtrack the requirement, depending on the level of resistance by the community, which is exactly what happened back in the days of Windows Vista. So it could well turn out that upgrading to Windows 11 without these features will be possible - we'll have to wait and see in that regard.
With that said though, there's really no reason not to enable these measures in an age where malware attacks have been on the increase. And especially so for many of those that have and will continue to be working from home into the near future - they may well find that their businesses start requiring them to use data encryption on personal devices which they've been using to store sensitive business information and documents. Ultimately, they're features designed to keep you and your information safe, so what's not to like?
We hope this article has been of some help in clearing up the confusion surrounding Windows 11, TPM and Secure Boot. As always, if you have any questions, concerns, or comments, do feel free to leave them down below and we'll get back to you as soon as we can. Or, alternatively, you can get in touch with our friendly, knowledgeable support team via phone or our online chat.
Posted in TechShot
Published on 19 Jul 2021
Last updated on 09 Feb 2023